Smooth flooring transitions do more than prevent stubbed toes. They guide movement, tie rooms together, and protect edges from wear. Whether you are blending hardwood into tile at a kitchen threshold or carrying luxury vinyl plank down a hallway that meets carpeted bedrooms, the details at that seam will either announce themselves every time you walk by or disappear into the flow of the space. Getting it right requires forethought, a good read on materials, and a steady hand during installation.
Where transitions work, and where they fall apart
Most homes call for at least three flooring types. Kitchens and baths ask for tile or another water safe surface. Living areas want warmth underfoot, often hardwood or engineered alternatives. Bedrooms tolerate soft surfaces. The friction happens at the doorway, at a wide opening between spaces, or along a peninsula where one surface meets another at an angle. Common failure points are predictable. A height difference of more than 3 to 4 millimeters without a planned ramp creates a lip that catches socks and vacuum heads. A sloppy cut, even if hidden by a T molding, leaves edges vulnerable to chipping. An overly stark material change at a wide cased opening can make a home feel chopped up, even when the materials themselves are beautiful.
I have walked into homes where the primary suite door opens to a hardwood hall and a bright white marble bath, but the threshold is a raw, jagged line barely covered by a shiny aluminum strip. That strip is not the problem by itself, but the wrong size and color announce the compromise. On the other hand, I have stepped into kitchens where the hardwood planks precisely picture frame the tile field with a stained reducer that matches the floor, and you only notice the change if you stop to examine it.
Plan transitions on paper, not on demo day
Transition details should be fixed during the design phase, not left to field improvisation. Two numbers drive everything. First, the finished heights of each material, including underlayment, thinset, adhesive, heating mats, and the flooring itself. Second, the width of the opening or seam where the materials meet.
When planning a renovation, especially if you are considering radiant floor heating in a bath or mudroom, you must account for the extra build up that heat cables and self leveling compound bring. A typical electric mat with self leveling cement can add 3 to 6 millimeters before tile. That is enough to make a T molding sit proud or force a steep reducer that looks amateurish. If you design toward a single plane by selecting a thinner tile or a lower profile heat system, the finished transition can be flush and nearly invisible. If you cannot make the heights match, specify the exact reducer, color, and finish you want. Avoid leaving it at “we will figure it out.”
In open concept vs. traditional layouts, the role of the transition changes. With large sight lines, you want the seam to reinforce zones without becoming a visual fence. In traditional plans with doors and narrower openings, you can be bolder with a defined saddle or a wood threshold. Neither approach is inherently right. The key is to treat the transition like a design element, not a patch.
Material behavior matters more than marketing names
Hardwood, engineered wood, tile, stone, LVP, laminate, cork, bamboo, carpet, each expands and contracts at its own pace. Wood based products move with humidity, especially across the width of a board. Porcelain tile barely moves at all once set. These behaviors set the rules for how close you can bring one to the other.
At Revive 360 Renovations, we insist on expansion gaps wherever a floating floor meets a rigid floor. If a floating LVP locks hard against a tile edge, seasonal swelling will push up a tent along the seam. That tent might appear months after the installer has packed up, but it is the direct result of an unforgiving transition. We keep a 6 to 10 millimeter gap at that interface, then cover it with a properly sized T molding or a flush spline detail if the height allows. The same logic holds when hardwood boards run parallel to tile. The hardwood needs breathing room, even if the joint looks tight on day one.
Tiles introduce their own edge requirements. A clean tile edge should be protected with a profile trim, especially at a doorway that will see vacuum wheels and pet paws. Metal edge profiles like a square stainless or a color matched aluminum become part of the finished look. Plastic trims can work, but they scratch and yellow faster. If the budget allows, pick the metal profile that harmonizes with your fixtures. The details line up without shouting.
Four transition formats that consistently work
Some transitions look good in photos and fail in the field. Others survive decades of foot traffic. These four approaches have proven reliable across styles and budgets.
- Flush reducer: Best for small height changes, often 3 to 8 millimeters. A hardwood flush reducer slopes gently down to meet a thinner material like tile or LVP. It reads as part of the wood floor and can be stained to match. T molding: Designed for equal height surfaces, especially where one side is floating. The T rides over the gap, allows movement, and creates a slim, controlled line. When color matched and sized correctly, it disappears. Square profile with shadow line: Ideal for modern spaces with precise tolerances. Both floors finish flush, separated by a consistent 3 to 6 millimeter shadow line, often created with a metal profile. It is tidy and architectural. Threshold or saddle: Works at doorways and wet room entries. Stone or wood saddles define the break and protect edges. They are more visible, which can be a feature in traditional homes.
Each of these formats has variants, but the idea is consistent. Respect height and movement, choose a profile that belongs to one of the materials, and carry that choice through the home so the language stays consistent.
Color and grain, the silent persuaders
When two materials meet, your eye reads contrast first: light to dark, matte to gloss, smooth to textured. If the transition lands between a walnut floor and a bright ceramic, a white or chrome edge will accentuate the difference. That can be beautiful if the rest of the palette supports it. If the goal is quiet, choose a transition component that matches the dominant field. On hardwood to tile joints, a wood reducer stained to the hardwood color visually stretches the plank field into the threshold, then lets the tile take over. The seam drops away.
Grain direction plays a role. I prefer to run wood planks into an opening, then cut them straight and square so the end grain forms a clean line. The tile then “tucks” to that edge. It looks intentional and eliminates tiny slivers of tile that chip. If the room dictates tile first, reverse the logic. Establish a square tile field edge with a profile, then scribe the wood to that line with a few extra boards on site for test fits. Either way, you prioritize full pieces at the seam rather than thin rips.
The floating floor trap, and how to avoid it
Floating floors feel easy until you hit a threshold. They need consistent expansion gaps and prefer continuous fields to broken, chopped areas. In long hallways that feed multiple bedrooms, the best solution is often to carry the floating product through the common area and stop at the doorways, then use T moldings into carpet or tile. It is tempting to hard glue a floating plank at a tricky seam to lock it in place. That shortcut will fail. The glued plank will not move with the rest of the field, and the stress will find a weak joint several feet away.
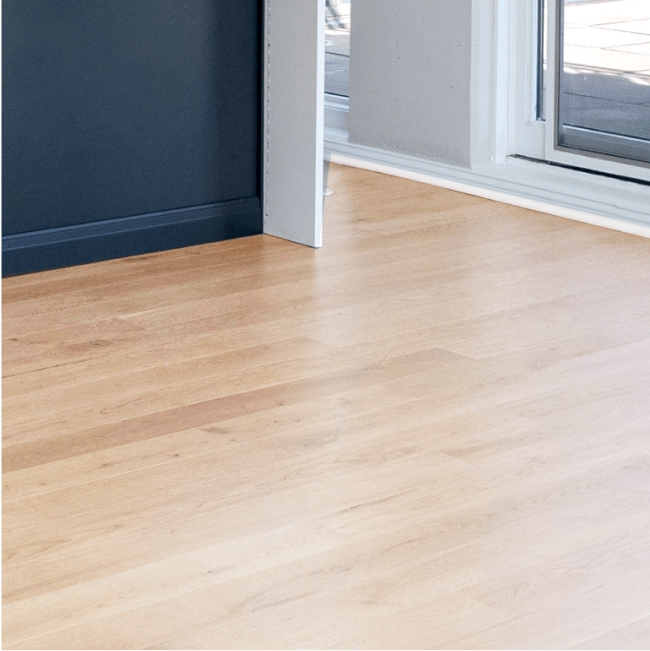
In a condo retrofit, we installed a cork floating floor in the living and dining area. It met a porcelain kitchen tile at a 9 foot opening. The client wanted no transition strip. We created a flush, movement tolerant joint by setting the tile on a thinner membrane, bringing it to the same height as the cork, and installing a recessed metal profile with a slight lip to cover the expansion gap on the cork side. The joint remained clean and silent through two winters and humid summers because the cork could still breathe under the profile.
Wet rooms, mudrooms, and the question of containment
Any space that regularly sees water deserves a more robust boundary. A low saddle at a bathroom door forces drips to stop and protects floors outside the room. Curbless showers complicate this by design, but the bath entry still benefits from a deliberate break. In Chicago’s climate, where slush comes in on boots half the year, mudroom transitions earn their keep. I prefer a durable porcelain in the mudroom with either a stone saddle or a thick wood reducer into the adjacent hallway. The wood reducer holds up to grit better than a thin T molding. Combine that with a high quality doormat and a drain if you have the chance during construction. You gain everyday practicality without sacrificing style.
Structure under the surface, the hidden success factor
Transitions live only as well as the subfloor under them. If one side rides on a patchwork of old plank subfloor and the other on fresh plywood, you will fight telegraphing and differential bounce. On large remodels, we often take the time to resheet the entire level with the same underlayment thickness, then feather in self leveling compound at planned transitions. That prep takes a day, sometimes two, and costs a few dollars a square foot, but it pays back every time a door clears the seam smoothly or a chair glides across without catching.
Floor leveling becomes obligatory when you have bold tile patterns meeting wood, like a herringbone that runs into a straight lay plank. Even a 2 millimeter dip telegraphs at the joint under raking light. The best installers check with a 6 foot straightedge, mark highs and lows, and address them before any finish material goes down. It is not glamorous work, but it sets the stage for a refined finish.
When to use a feature border
Feature borders help transitions disappear into a wider composition. A narrow band of contrasting wood, laid perpendicular to the main field, can act as a frame that receives the tile. You see this in older homes with inlay work near fireplaces and entry doors. A modern version uses a single species border, stained slightly darker, as a simple picture frame around a tile hearth or kitchen zone. This approach hides micro irregularities at the seam, because the border assumes the role of the break. It also aids repairs later. You can remove and replace the tile within the frame without disturbing the main wood field.
Temperature swings and seasonal movement, especially in the Midwest
In cities like Chicago, humidity swings from arid in January to swampy in July. Wood floors respond. That is why the best time of year to remodel your home in Chicago, if you want the most stable read on wood movement, is shoulder season. Spring and fall allow you to acclimate wood closer to the midpoint of its expansion range. If you set a snug wood to tile joint in the driest week of winter, that joint can close too tightly in summer. Transitions that incorporate a shadow line or a flexible profile absorb this shift. If your schedule forces a winter install, increase the expansion gap slightly and lean on a cover profile. It feels cautious in the moment and sensible a year later.
Practical ordering and sequencing on site
Installation order matters. Tile first, wood second is the default in kitchens and baths, because the tile sets the water line and is less forgiving. If you are using a metal edge profile, install it with the tile so the depth is locked in. Then bring the wood to it. If you need a flush wood reducer, mill and finish it before you start the field, dry fit it at the threshold, then remove it while you lay the rest. You avoid last minute sanding and stain near fresh tile.
During preconstruction, collect samples of every floor material, their underlayments, and the chosen transition profiles. Stack them on a flat surface to verify finished heights. Write the actual measurement on each sample. This simple exercise prevents the most common mistake: assuming nominal thicknesses will add up as the manufacturer claims. Thinset thickness varies with trowel size and installer technique. Floating floors from different brands labeled 6.5 millimeters can differ by almost a millimeter. That difference shows at a threshold.
A short field checklist for clean transitions
- Confirm finished heights with real samples, including adhesives and underlayments. Decide the transition profile, color, and finish before ordering flooring. Plan movement gaps where wood or floating floors meet rigid materials. Place transitions under door centers when possible for visual alignment. Level subfloors and feather edges before finish installation.
How Revive 360 Renovations approaches complex seams
On larger projects with several flooring types, Revive 360 Renovations creates a transition plan as a separate drawing. It shows where every seam occurs, the profile to be used, and the exact dimensions at each opening. We mark door centers and casing widths so installers hit the visual center with the seam, not two inches off because the drywall is crooked. We also assign responsibility. Tile sets first with profiles in place, then hardwood comes in behind. If LVP is specified, we shift to T moldings or shadow lines that preserve the floating field. This removes guessing and keeps the site moving.
A recent townhome remodel included wide plank white oak in living spaces, porcelain in the kitchen and baths, and wool carpet in bedrooms. The client wanted quiet, uninterrupted lines. We achieved this by bringing the tile and oak to the same height with a thinner membrane under the tile and a slightly thicker underlayment under the oak where needed. At the kitchen opening, a square stainless profile created a 4 millimeter shadow line. At the bedroom doors, low oak saddles stained to match the floor provided a tidy lip against carpet. Eighteen months later, the seams remain invisible unless you go looking https://www.reviverenovations.com/ for them.
Slab homes and basements have their own rules
Concrete slabs change the math. Sweat from the slab can loosen adhesives and warp wood if not addressed. When transitioning from tile set on a slab to engineered wood, choose a moisture appropriate underlayment and test the slab. If moisture readings are high, consider floating engineered wood with a built in vapor barrier rather than glue down. That choice affects the transition profile. You now need a T molding or a profile that allows movement on the wood side. In basements, where many homeowners want durable flooring with warmth, luxury vinyl plank to tile is a common pairing. Keep the vinyl’s expansion gap consistent at the tile edge and select a reducer that will not lift with changing humidity.
Stair noses and landings, the overlooked cousins of transitions
Where a hallway meets a staircase, the stair nose is the transition. If you change flooring type at the top step, the nosing should belong to the upper floor material for a coherent edge. Switching materials mid landing can work if the landing visually belongs to the lower level, but it often reads as a mistake. We like to run the same species and finish across the landing and down the first tread. It creates a clean line and saves you from a half inch lip where carpet tries to meet wood on a bullnose.
If you must bring carpet to a wood stair nose, use a waterfall edge on the carpet that tucks tight under the nose without a metal tack strip visible at the top. That detail holds up to traffic and looks intentional.
Design intent first, then cost control
You can plan a home renovation on a budget and still achieve elegant transitions, but do not start by shopping the cheapest trims. Decide how you want the seam to look, then find the most cost effective way to reach that appearance. A color matched T molding from the same LVP manufacturer might cost more than a generic aluminum strip, yet it will blend with the plank and avoid telegraphing the seam. The difference in material cost at five thresholds might be a couple hundred dollars. The difference in perceived quality is much larger.
Hidden costs of home remodeling often hide in small misses that force rework. A botched transition can require cutting out a row of tile or boards, remaking a reducer, and repainting adjacent trim. Protect yourself with accurate measurements, early decisions, and a bit of contingency in the schedule.
Seasonal construction schedules and occupant comfort
If you are living through a remodel, minimizing disruption includes smart sequencing around transitions. We often leave door thresholds as the last piece of a flooring phase so you can keep using rooms safely. Temporary ramps made from taped plywood strips prevent trips when there is a height difference before reducers go in. Warn movers and delivery teams about unfinished seams. A dolly wheel across a raw tile edge can chip a corner in a second.
The best time to schedule final sanding and staining of hardwood, if you are matching reducers to a site finished floor, is after all dusty work is complete but before installing the transition profiles that touch tile. Stain and finish move differently than factory finished boards, so you need a clean environment to get an even sheen at those high visibility edges.
Coordination with doors, cabinets, and built ins
Doors dictate transition placement. The ideal seam sits directly beneath the closed door so each room owns its material. If an opening lacks a door, align the seam with the centerline of the casing. That reads clean. If built ins, like a mudroom bench or a kitchen island, cross an intended seam, rethink the layout. Avoid seams directly under toe kicks or where they disappear under casework. They are hard to service and look accidental when revealed later during a remodel.
At Revive 360 Renovations, we involve carpenters early to confirm casing thicknesses and clearances. A thicker plinth block might allow a slightly wider saddle that looks proportional. Conversely, a minimal modern casing benefits from a tight shadow line and a flush joint. These are small judgments that add up to a cohesive whole.
Energy efficiency, heating, and floor performance at transitions
Radiant floor heating complicates transitions mostly on the tile side. Do not run heat mats into a threshold where a wood reducer will sit. Heat can dry wood faster at the edge and encourage gaps. Keep the heated zone back from the seam by at least two inches and mark that boundary on the floor plan. If you are choosing energy efficient materials overall, remember that cork and some underlayments insulate. Where you want heat to transfer upward efficiently, choose a low R value underlayment under tile. Where you want warmth underfoot without heating, cork can add comfort in bedrooms and offices and still meet cleanly at a reducer.
When the seam itself becomes the feature
Some homes lean into bold transitions. A patterned cement tile inset in a wood floor at a kitchen or bar can define a zone with a flourish. Two tone wood borders can echo cabinet finishes. If you go this route, commit. Center the pattern, align grout joints with plank edges where possible, and keep the field square. Poor alignment at a featured seam stands out far more than at a quiet one. Take the time to dry lay the pattern and check it against sight lines.
Quality assurance after installation
Before you call a floor done, walk every transition with a coin and a flashlight. The coin will find lips you miss with your hand. The flashlight, held at a low angle, exposes lippage in tile and gaps under profiles. Listen as you step across. A hollow click under a reducer signals a weak glue bond. Catching it during punch saves a service visit. Note how vacuum and mop heads pass over the joints. If they catch, the profile is too tall or the slope too steep. The remedy might be as simple as planing a wood reducer and touching up the finish.
A second short list, this time for homeowners during consultations
- Bring all flooring samples to your remodeling consultation, including trims. Ask for a transition plan drawing that shows profiles and heights. Confirm how floating floors will move at each seam. Discuss seasonal movement expectations in your climate. Request mockups for any feature borders or shadow line details.
The final judgment, and what stays invisible
The best transitions become a non event. You feel a continuous path underfoot. You clean without snagging. Your eye moves from one room to the next without stuttering, even if the materials change character. That quiet confidence comes from small, precise choices and a respect for how materials behave over time. Pay attention to finished heights early, protect edges with appropriate profiles, and choose a visual language you can repeat throughout the home.
When our teams at Revive 360 Renovations review project photos a year later, we look closely at thresholds and wide openings. They tell us if our planning held up to daily use, if expansion gaps did their job, and if the profiles we selected aged well. The most satisfying images are the ones where it is hard to see what we did at all. The rooms breathe, the floors perform, and the transitions do their work quietly in the background.